
When you search “coilover install near me”, you may also conside a DIY installation. DIY installation is not out of the question, usually taking about 2 hours to install the front and rear. This is a installation instruction for general coilovers so you know how to install the coilovers bought from online store such as MaXpeedingRods when you have no mechnic to get it installed.
What you’ll need?
- Floor jack and jack stands
- Socket set
- Breaker bar
- Torque wrench
- Penetrating oil (like PB Blaster)
- Antiseize
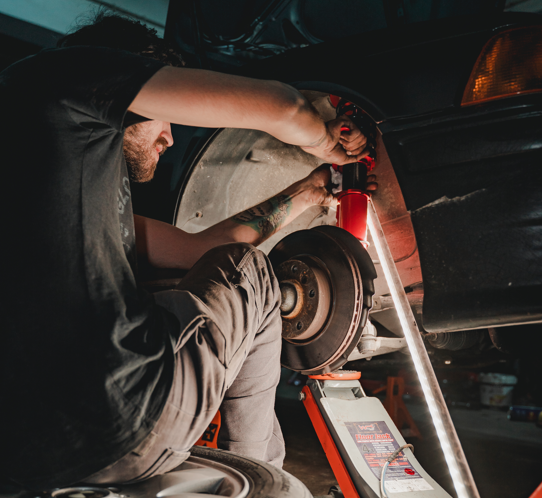
Front Coilovers Install
Step 1
Using a car jack or an automotive lift, safely raise the vehicle to desired height. Paying special attention to the safety precautions set forth by the equipment manufacturer. Stabilize and support the car using any necessary equipment such as jack stands of sufficient load rating. Typically, a 2-ton jack stand should be sufficient for most applications.

Step 2
Remove the wheels of the vehicle and place them aside to expose the wheel well and suspension system. As a recommended safety precaution, it is a good idea to place the wheels underneath the vehicle, along the side skirt area in case of jack stand failure.
Step 3
Remove any brake lines or hardware that is attached to the OEM shock/strut assembly and save all the parts that you have removed. You will be re-using some OEM hardware with the damper kit to re-mount the brake lines, ABS lines or any other lines mounted to the shock assembly.
Step 4
For the front suspension, remove the nuts and/or bolts that mount the lower bracket of the shock to the lower control arm. It is also recommended to disconnect the sway bar end link to disconnect one end of the suspension from the other to avoid any pre-load. Loosen the nuts from the top of the engine bay to loosen the shock assembly from the vehicle. Do not remove the nuts, just loosen them leaving a few threads of engagement or else the entire assembly will drop down from the vehicle. Make sure you have clearance to remove the shock assembly from the vehicle—watch for any brake/ABS lines that are affixed to the shock assembly.
Step 5
Once it is clear, carefully remove the shock assembly from the vehicle trying to avoid contact with any of the suspension or brake components, especially the brake fluid line. Be sure to support the suspension assembly as you remove the hardware.
Step 6
With the original suspension equipment off of the vehicle, now would be a good time to set the height of the new coil-overs. It would generally be a good place to start by setting the length of the coil-over assembly by approximating the desired shortened length compared to the OEM suspension components.

Step 7
With the shock length already adjusted, it is time to mount them on the vehicle. Lift the damper kit through the underside of the chassis into a position where the studs go through the OEM bolt-holes on the strut tower mount. Thread the nuts till you can see at least two threads past the top of the nut from the stud on the damper kit, but do not tighten. This will allow an ample amount of movement in the suspension system to help align the lower hardware. Be cautious when pulling down on the hub/knuckle assembly as it pulls the axles apart and may potentially cause damage. Do not pull use too much force when doing this. Use caution and proceed carefully.
Step 8
Using the OEM hardware, replace the lower mounting hardware into the lower bracket and hand-tighten them. Now is a good time to mount all of the loose brake lines and/or ABS lines that were previously affixed to the OEM shock body. Re-use the OEM hardware to do so. In some applications, the sway bar end links mount directly onto the lower bracket of the coil-over assembly. Now would be a good time to do so.
Step 9
Torque the top nuts on the top of the damper assembly to OEM torque specifications and then toque the lower hardware at the bottom of the damper to OEM torque specifications as well.
Rear Coilovers Install
Step 10
For the rear suspension, it is the same way like the front.
Perform the Adjustability
Step 11
Lower the vehicle to the ground and take note of the ride height. It would be best to at least roll the car forward and back a few times to allow the suspension to settle. Driving the car up and down the street will create the same affect, allowing the suspension bolts to settle in place to give you the true ride height. Make all adjustments to the suspension system as you desire.
Step 12
Adjust the camber to an equal setting on both the left and right side of the car, if the coilover kit comes with camber plates.
Camber plates are only included in some MacPherson strut applications. Adjust the ride height to the same setting on both the left and right sides of the car. Adjust the damper setting on the suspension to your desired rate. Adjust the setting by tightening the knob all the way till it stops, and then turning back the knob.
Step 13
Once the ride height is set, drive to the nearest alignment shop to make sure the alignment settings are set correctly. Any time you remove or even loosen a suspension component such as control arms and especially when replacing the suspension, the alignment will be thrown out of specification. For alignment recommendations on your particular vehicle and driving style, please feel free to contact our tech department to discuss your options.


installing my coilovers today all was well until i attempted to use the oem camber bolt. its way to big for the cut out allowed. is there a solution to this issue. I have a 2003 subaru legacy bh
I can’t seem to find an instructional video to install my rear max speed coilovers non camber just for ride height for my 2007 Mazda 3 hatchback Sport non turbo can you help me
Hello!Thank you for choosing our products. To assist you better, may I kindly inquire which specific model of coilover you have purchased from us? Having this information will allow us to provide you with the best possible support.
I also had trouble installing the rear coilovers for my 2007 Mustang GT. Send emails to max speeding ansking for help and never got a response back.
I’m sorry to hear that. Please feel free to call our customer service at (1) 213-459-3517 for immediate assistance. We’re here to help!
I’m waiting on a response from someone about installation instructions for my B7 AUDI Avant, Coil Over suspension! There’s no phone number and no response from contact seller.
Hi, I recommend you connect our after-sale support department, they will fix your issue immediately.
Email: SupportUS@Maxpeedingrods.com
hotline:(1)213-459-3517
Do you have any information on installing T6’s on a 2009 Nissan Cube.
Hi, I recommend you connect our after-sale support department, they will fix your issue immediately.
Email: SupportUS@Maxpeedingrods.com
hotline:(1)213-459-3517